
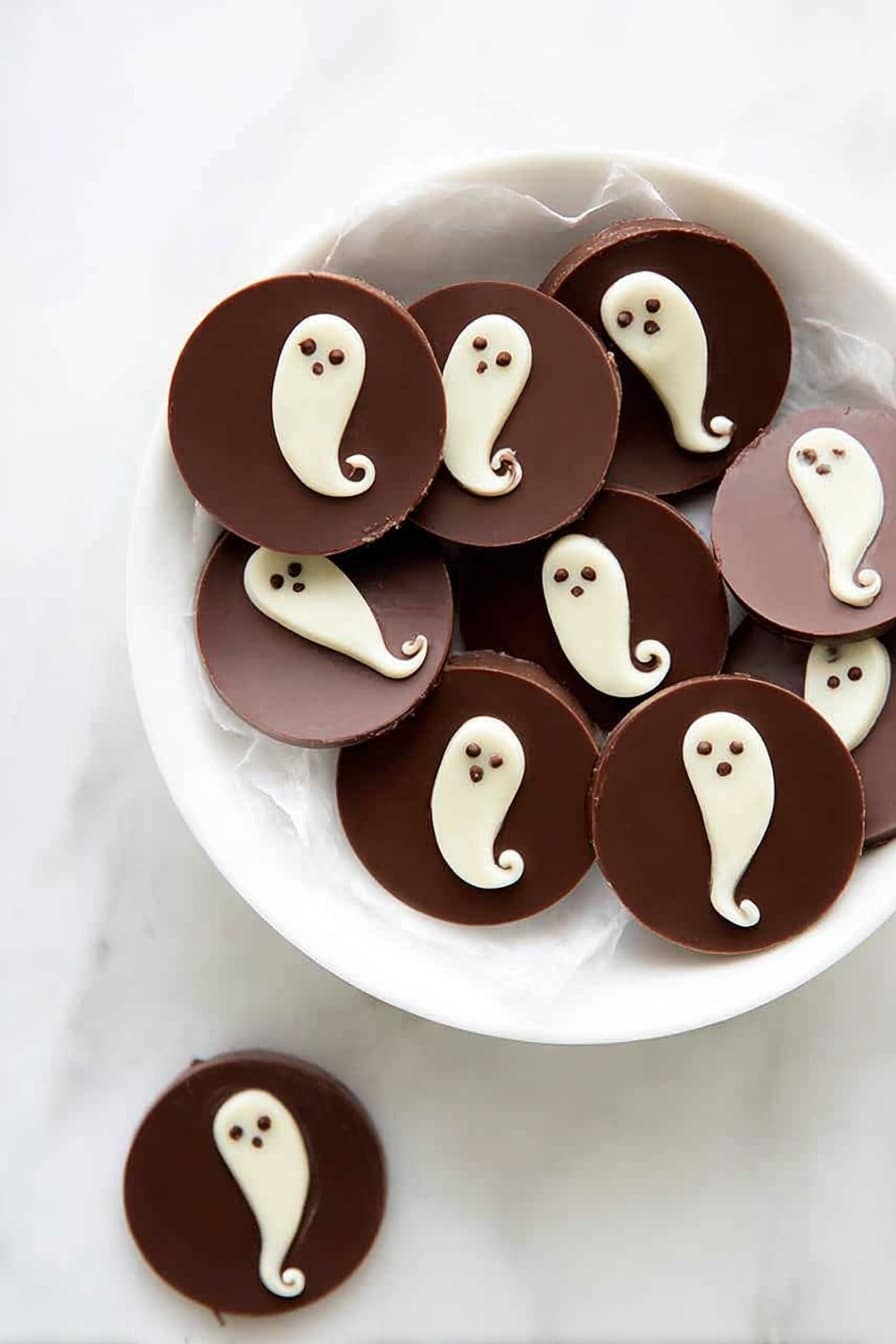
If you’re looking for a super fun and surprisingly simple treat, then this 2-Ingredient Ghost Chocolate Cups Recipe is absolutely for you! These spooky yet sweet little cups are perfect for Halloween or anytime you want a quick homemade chocolate delight. Made with just dark and white chocolate, they’re as charming as they are delicious.
Why You Should Make This Recipe
Ridiculously easy to make: With only two ingredients, you can whip up a batch in no time, even if you’re not a kitchen pro.
Perfect for Halloween parties: These cute ghost shapes add instant festive cheer to your dessert table.
Customizable and fun: You can get creative with colors or decorations to match any occasion.
Deliciously chocolatey: Combining smooth dark chocolate with sweet white chocolate creates a fantastic flavor contrast that’s irresistible.

Ingredients & Substitutions
The magic behind these ghostly treats lies in just two essential ingredients: dark and white chocolate. Each one plays its own role—dark chocolate offers a rich, intense base, while the white chocolate lets you craft cute ghostly details that pop visually and taste sweet on the palate.
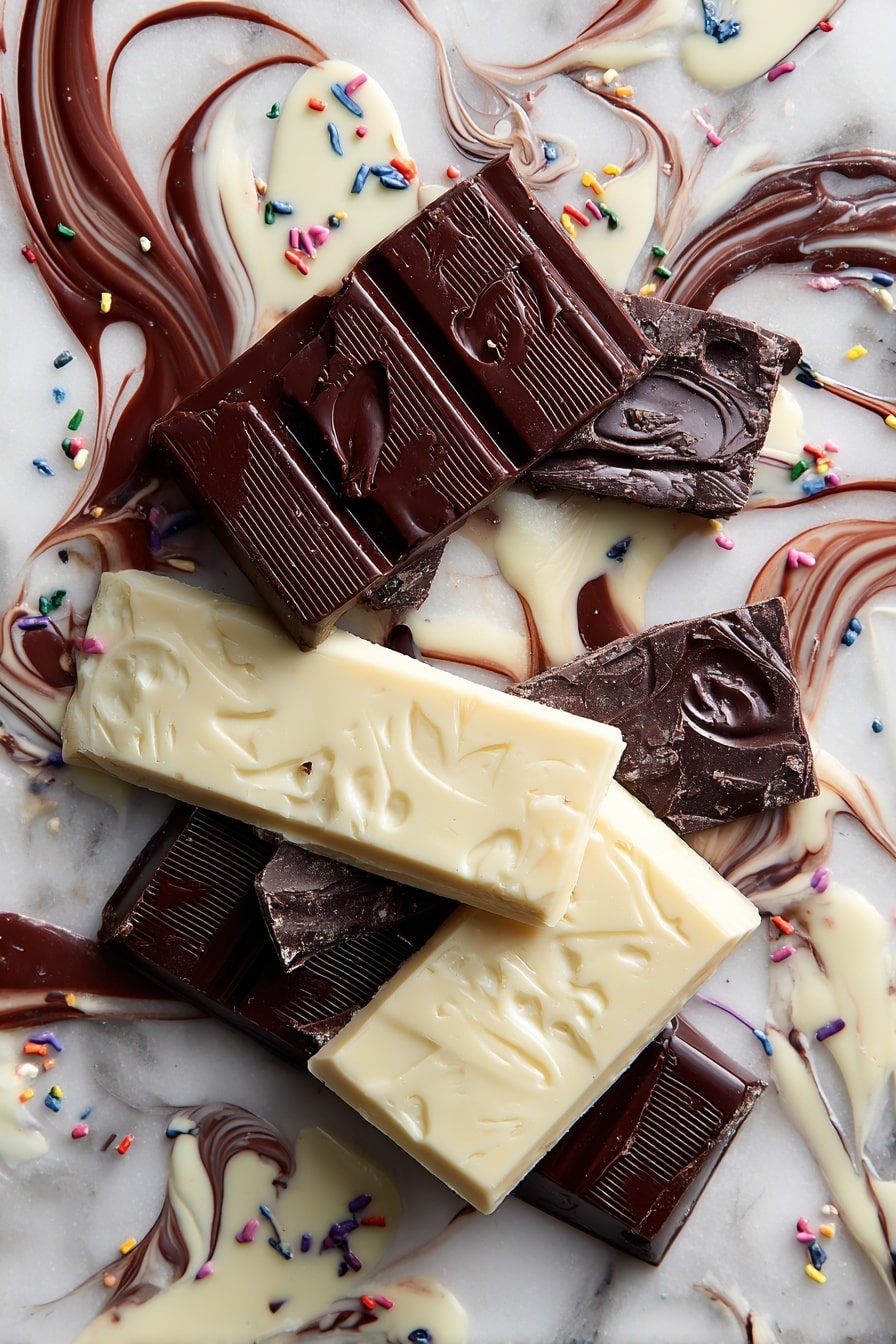
- Dark chocolate: Use good-quality dark chocolate for a smooth, rich flavor. Chopped pieces melt evenly and give you control over the texture.
- White chocolate: This provides the perfect canvas for your ghost shapes and can be easily melted and piped for intricate designs.
How to Make 2-Ingredient Ghost Chocolate Cups Recipe
Step 1: Melt the Dark Chocolate
Start by melting your dark chocolate in a heat-proof bowl using the microwave. Heat it in short bursts of 20 seconds, stirring in between to ensure the chocolate melts evenly without burning. This gentle melting process is key to achieving that smooth base texture for your cups.
Step 2: Transfer Dark Chocolate and Melt the White
Once the dark chocolate is silky and fully melted, spoon two tablespoons into a small plastic bag for later use. Then, melt the white chocolate in a separate small bowl, again heating in 20-second increments and stirring regularly until it’s completely smooth and ready for piping.
Step 3: Form the Chocolate Cups
Pour the melted dark chocolate evenly into a silicone muffin pan to form the cups. Silicone makes it easy to pop the chocolates out later without breaking them, so this tip is a kitchen lifesaver!
Step 4: Create Your Ghosts
Snip the corner of the bag with your melted white chocolate and pipe spooky ghost shapes directly onto the warm dark chocolate cups. Use a skewer or toothpick to drag one side of each white circle out to give your ghosts a cute little tail. Then, snip the bag with your reserved dark chocolate and pipe on eyes and little mouths to bring your ghosts to life!
Step 5: Chill and Set
Pop your tray into the fridge for at least 10 minutes to let all the chocolate firm up nicely. Once set, your 2-Ingredient Ghost Chocolate Cups are ready to scare up some smiles!
How to Serve 2-Ingredient Ghost Chocolate Cups Recipe
Garnishes
To add a festive flourish, try sprinkling colorful edible glitter or tiny candy sprinkles on top before chilling. You can also drizzle a little extra melted chocolate or even dust some cocoa powder for an elegant finish—just enough to make your ghostly treats pop visually!
Side Dishes
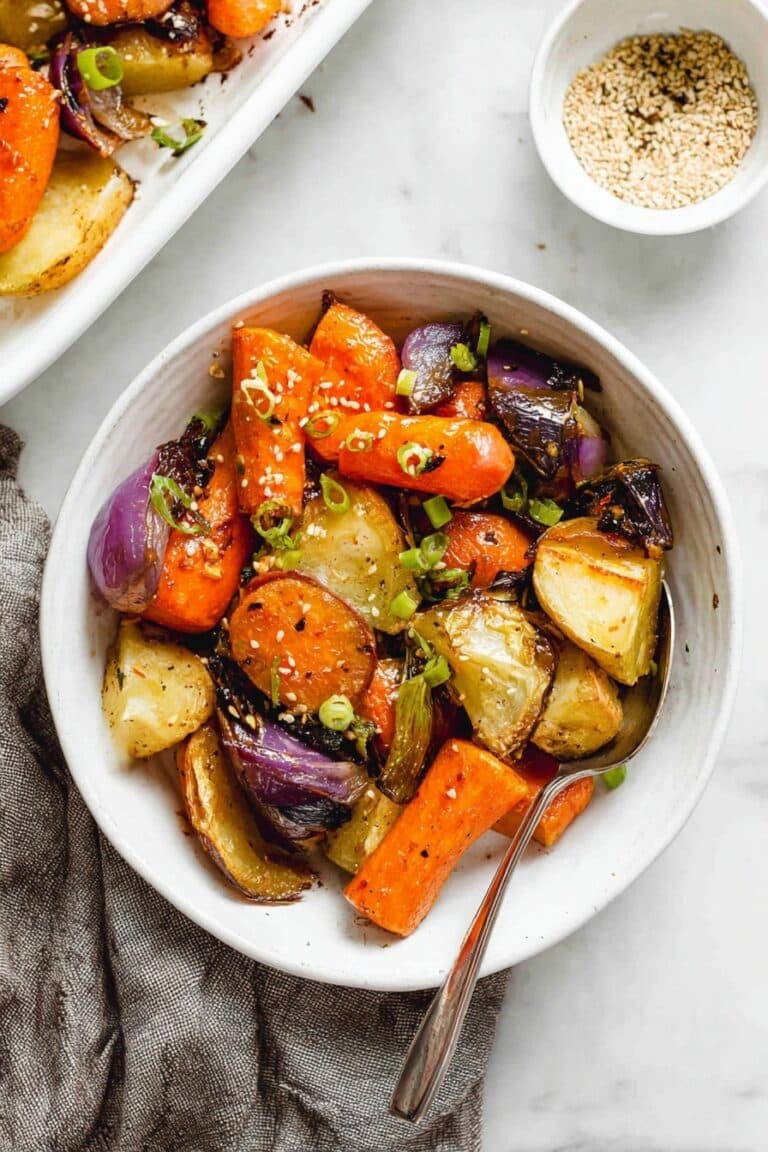
Pair these chocolate cups with fresh berries or a scoop of vanilla ice cream to balance the richness. Lightly roasted nuts or a simple fruit salad can make for a fun contrast and round out your dessert spread beautifully.
Creative Ways to Present
Try presenting your ghost cups in festive Halloween-themed muffin liners or arrange them on a platter with autumn leaves and candles for a spooky but inviting atmosphere. You could also package them in clear cellophane bags tied with orange or black ribbons for a delightful gift.
Make Ahead and Storage
Storing Leftovers
Keep any leftover ghost chocolate cups refrigerated in an airtight container to maintain their shape and freshness—they’ll stay perfect for up to a week. Storing them properly prevents melting and helps preserve that satisfying snap when you bite into them.
Freezing
For longer storage, place the cups in a freezer-safe bag or container and freeze for up to 3 months. When you’re ready for a treat, just thaw them gently in the fridge before serving to avoid condensation spoiling their delicate texture.
Reheating
Reheating isn’t really necessary for this chocolate treat, as they’re best enjoyed chilled or at room temperature. If the chocolate looks a little foggy after refrigeration, simply let the cups sit out for 10–15 minutes to come to room temperature before diving in.
FAQs
-
Can I use different types of chocolate for this recipe?
Absolutely! While dark and white chocolate create the classic ghost look, you can swap dark chocolate with milk chocolate or use colored candy melts for the white chocolate to make colorful ghosts.
-
What if my chocolate seizes while melting?
Chocolate seizing happens if even a bit of moisture gets into your melting bowl. To prevent this, ensure all utensils and bowls are dry. If it happens, you’ll need to start fresh, but melting in shorter microwave bursts and stirring helps avoid that problem.
-
Can I make these ghost chocolate cups ahead of time?
Yes! These cups keep really well refrigerated and even freeze nicely, making them a fantastic make-ahead treat for your parties or just for sweet cravings down the road.
-
Is a silicone muffin pan necessary?
While you can use a regular muffin pan, silicone offers a non-stick surface, making it much easier to remove your delicate chocolate cups without breaking them.
Final Thoughts
There’s just something so joyous about making treats that are as adorable as they are delicious. This 2-Ingredient Ghost Chocolate Cups Recipe is a quick way to add some sweetness and spookiness to any occasion. Give it a try—you might just find it becoming your new favorite go-to chocolate fix!
Print
2-Ingredient Ghost Chocolate Cups Recipe
- Prep Time: 10 minutes
- Cook Time: 5 minutes
- Total Time: 25 minutes
- Yield: 12 chocolate cups 1x
- Category: Dessert
- Method: No-Cook
- Cuisine: American
Description
These 2-Ingredient Ghost Chocolate Cups are a fun and spooky treat perfect for Halloween or any festive occasion. Made with simple melted dark and white chocolate, they feature adorable ghost designs piped on top for an impressive yet easy dessert. The recipe uses just two types of chocolate and requires no baking, making it a quick and delightful way to create themed chocolate cups with minimal ingredients and fuss.
Ingredients
Dark Chocolate
- 3 cups dark chocolate, chopped
White Chocolate
- 1/2 cup white chocolate, chopped
Instructions
- Melt the dark chocolate: Place the chopped dark chocolate in a heat-proof medium bowl and microwave in 20-second intervals. After each interval, stir the chocolate thoroughly before microwaving again. Repeat this process until the dark chocolate is fully melted and smooth.
- Prepare the dark chocolate piping bag: Spoon two tablespoons of the melted dark chocolate into a resealable plastic bag and set it aside for later use.
- Melt the white chocolate: In a separate heat-proof small bowl, melt the white chocolate in the microwave, stirring every 20 seconds until completely melted and creamy.
- Prepare the white chocolate piping bag: Transfer all the melted white chocolate into another resealable plastic bag and set it aside for ghost detailing.
- Create the chocolate cups: Pour the remaining melted dark chocolate evenly into a silicone muffin pan. Silicone is recommended for easy removal, but other muffin pans can be used as well.
- Pipe the ghost shapes: Snip a tiny corner off the white chocolate bag to pipe ghost shapes. While the dark chocolate is still warm, pipe circles of white chocolate onto each cup. Then, using a toothpick or skewer, drag one end of each circle outward to form a ghost tail.
- Add facial features: Snip a small corner off the dark chocolate bag and pipe small eyes and mouths onto each white ghost shape for an expressive finish.
- Chill to set: Place the muffin pan in the fridge and chill for at least 10 minutes until the chocolate cups are fully set and firm.
Notes
- Adapted from The Simple Sweet Life.
- Ensure bowls and utensils are completely dry before melting chocolate; any moisture can cause chocolate to seize and become unusable.
- For colorful ghost designs, add gel food coloring to the white chocolate or substitute with candy melts.
- Sprinkles can be added for extra festive fun.
- Store chocolate cups refrigerated for up to 1 week.
- Freeze chocolate cups in a freezer-safe bag for up to 3 months.


**sugarmute**
sugarmute is a science-guided nutritional supplement created to help maintain balanced blood sugar while supporting steady energy and mental clarity.
**gl pro**
gl pro is a natural dietary supplement designed to promote balanced blood sugar levels and curb sugar cravings.
**zencortex**
zencortex contains only the natural ingredients that are effective in supporting incredible hearing naturally.
**mitolyn**
mitolyn a nature-inspired supplement crafted to elevate metabolic activity and support sustainable weight management.
**yu sleep**
yusleep is a gentle, nano-enhanced nightly blend designed to help you drift off quickly, stay asleep longer, and wake feeling clear.
**prodentim**
prodentim an advanced probiotic formulation designed to support exceptional oral hygiene while fortifying teeth and gums.
**synaptigen**
synaptigen is a next-generation brain support supplement that blends natural nootropics, adaptogens
**vittaburn**
vittaburn is a liquid dietary supplement formulated to support healthy weight reduction by increasing metabolic rate, reducing hunger, and promoting fat loss.
**nitric boost**
nitric boost is a dietary formula crafted to enhance vitality and promote overall well-being.
**glucore**
glucore is a nutritional supplement that is given to patients daily to assist in maintaining healthy blood sugar and metabolic rates.
**wildgut**
wildgutis a precision-crafted nutritional blend designed to nurture your dog’s digestive tract.
**pineal xt**
pinealxt is a revolutionary supplement that promotes proper pineal gland function and energy levels to support healthy body function.
**energeia**
energeia is the first and only recipe that targets the root cause of stubborn belly fat and Deadly visceral fat.
**boostaro**
boostaro is a specially crafted dietary supplement for men who want to elevate their overall health and vitality.
**prostabliss**
prostabliss is a carefully developed dietary formula aimed at nurturing prostate vitality and improving urinary comfort.
**potentstream**
potentstream is engineered to promote prostate well-being by counteracting the residue that can build up from hard-water minerals within the urinary tract.
**hepato burn**
hepato burn is a premium nutritional formula designed to enhance liver function, boost metabolism, and support natural fat breakdown.
**breathe**
breathe is a plant-powered tincture crafted to promote lung performance and enhance your breathing quality.
**hepato burn**
hepato burn is a potent, plant-based formula created to promote optimal liver performance and naturally stimulate fat-burning mechanisms.
**cellufend**
cellufend is a natural supplement developed to support balanced blood sugar levels through a blend of botanical extracts and essential nutrients.
**prodentim**
prodentim is a forward-thinking oral wellness blend crafted to nurture and maintain a balanced mouth microbiome.
**neurogenica**
neurogenica is a dietary supplement formulated to support nerve health and ease discomfort associated with neuropathy.
**revitag**
revitag is a daily skin-support formula created to promote a healthy complexion and visibly diminish the appearance of skin tags.
**flowforce max**
flowforce max delivers a forward-thinking, plant-focused way to support prostate health—while also helping maintain everyday energy, libido, and overall vitality.
**sleep lean**
sleeplean is a US-trusted, naturally focused nighttime support formula that helps your body burn fat while you rest.
**memorylift**
memorylift is an innovative dietary formula designed to naturally nurture brain wellness and sharpen cognitive performance.
https://t.me/official_1win_aviator/134
https://t.me/official_1win_aviator/539
https://t.me/s/official_1win_aviator/497
https://t.me/Best_promocode_rus/1417
https://t.me/s/ef_beef
https://t.me/iGaming_live/4869
Izzicasino is one of my favorites! It’s super easy to deposit and withdraw funds. I’ve had nothing but perfect experiences! Check out what the hype is about: izzicasino
Хотите знать, кому можно доверять в мире онлайн-казино? Наш справочник проводит независимую экспертизу: проверяем лицензии, процесс выплат и качество игр. Рейтинги объективны — мы не торгуем позициями. Принципы оценки открыты для всех. Подойдёт как новичкам, так и опытным игрокам. Следим за изменениями и регулярно обновляем информацию. Узнать о рейтингах казино
I don’t think the title of your article matches the content lol. Just kidding, mainly because I had some doubts after reading the article. https://www.binance.info/register?ref=IXBIAFVY
I don’t think the title of your article matches the content lol. Just kidding, mainly because I had some doubts after reading the article.
Null’s Brawl, oyunculara sınırsız eğlence sunan popüler bir özel sunucudur. Bu platformda oyunun en son sürümleri, yeni karakterler ve farklı etkinlikler hakkında bilgi bulabilirsiniz. Null’s Brawl dünyasını keşfetmek isteyen herkes için rehberler ve güncellemeler paylaşıyoruz.