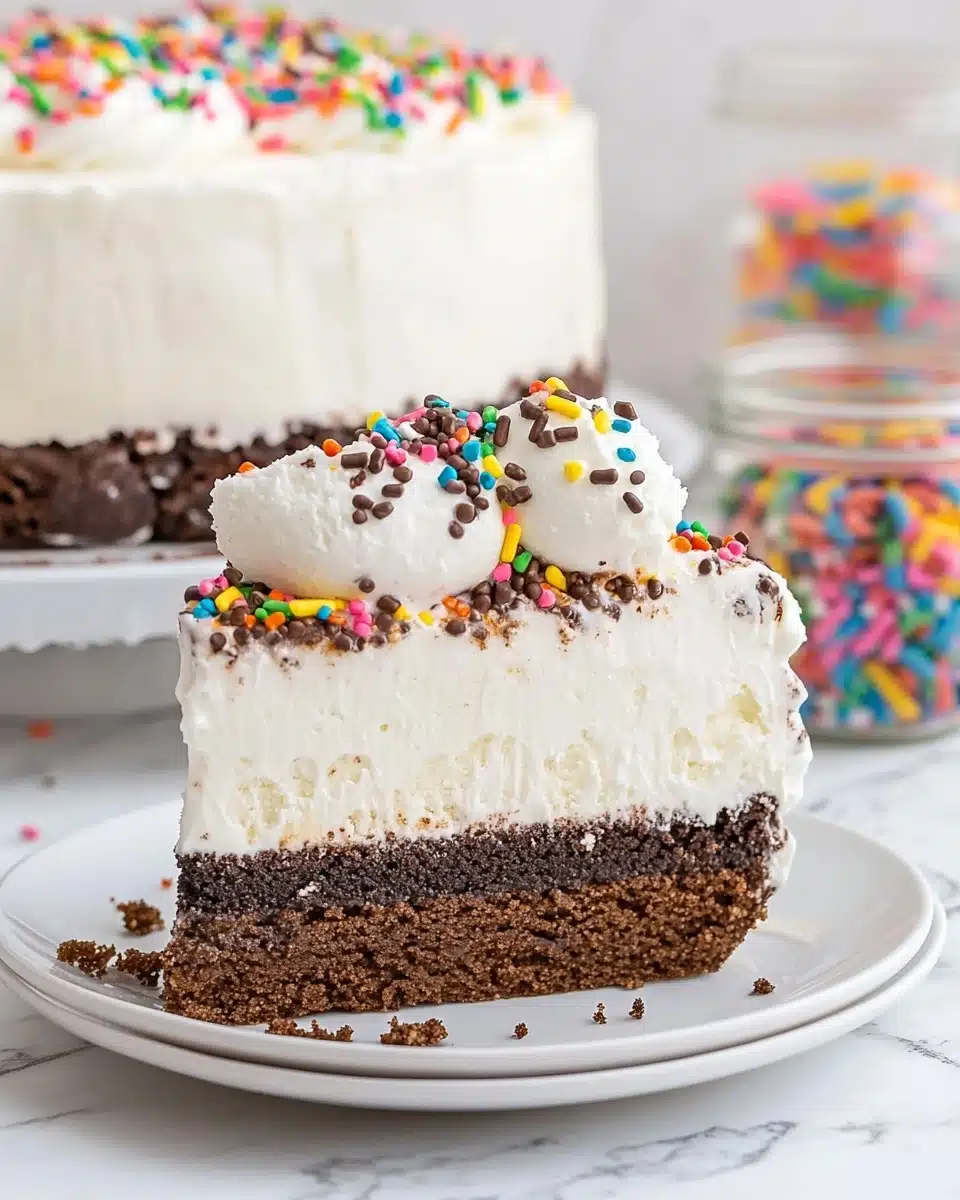
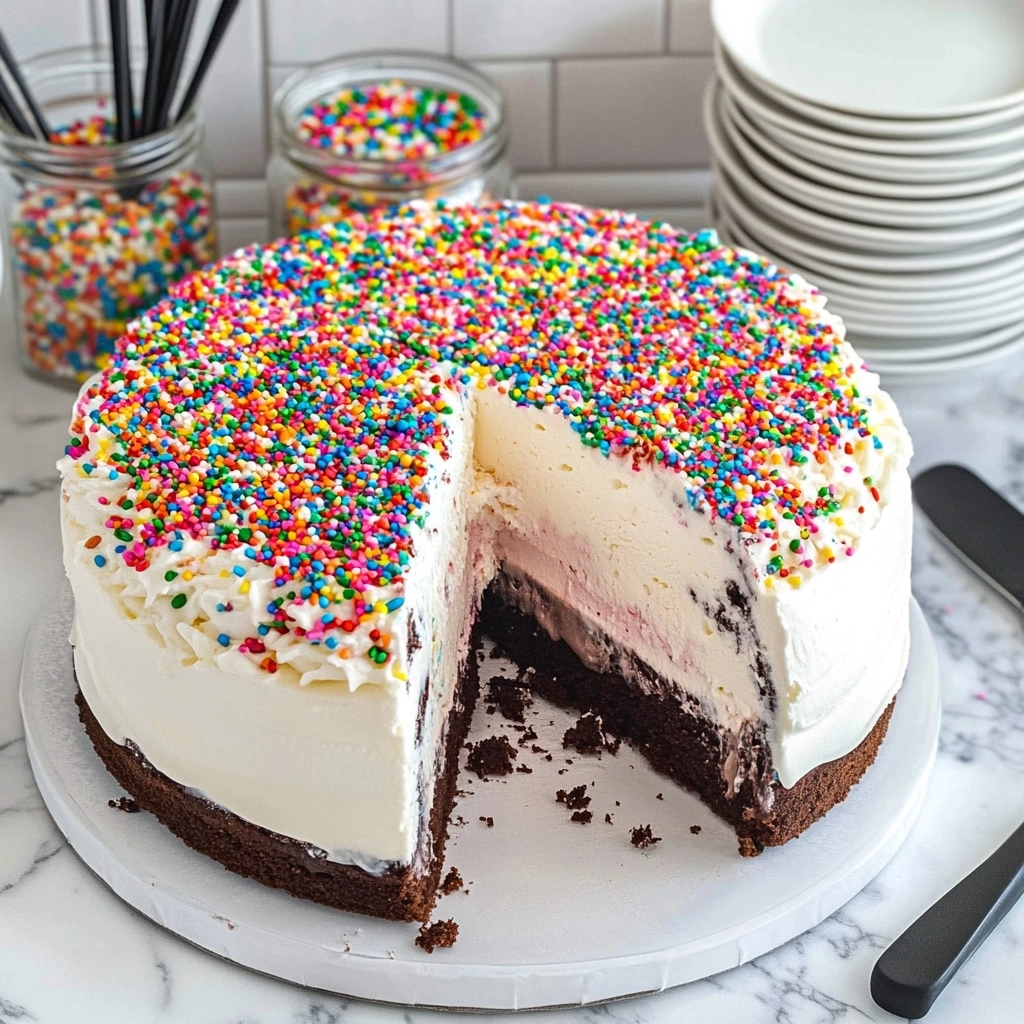
If you’re craving a celebration-worthy dessert right from your own kitchen, this Homemade Dairy Queen Ice Cream Cake is about to become your new favorite! Layered with silky chocolate ice cream, crunchy cookie crumbs, rich hot fudge, and creamy vanilla ice cream, then finished with fluffy whipped frosting, it’s the ultimate treat for birthdays, holidays, or just because.
Why You Should Make This Recipe
- Easier than you think! With simple store-bought ingredients and foolproof steps, you’ll be surprised at how quickly this masterpiece comes together.
- Fun for all ages: Kids and adults are guaranteed to swoon over every layer—from the fudgy center to the classic whipped topping.
- Customizable magic: Change up the cookies, ice cream flavors, or sprinkles to create your signature version of the iconic treat.
- Better than store-bought: Homemade Dairy Queen Ice Cream Cake lets you control every ingredient for the freshest, most decadent results.
Ingredients & Substitutions
The beauty of this recipe is just how approachable it is—no fancy equipment or specialty items required! Each ingredient brings something special, from the silky dairy layers and crunchy cookies to the classic whipped frosting and cheerful sprinkles.
- Chocolate ice cream: Go for a high-quality store-bought tub or your own homemade favorite for the fudgy base.
- Vanilla ice cream: You can’t go wrong with classic vanilla, or try swapping for French vanilla or even cake batter flavor for fun.
- Chocolate sandwich cookies: Traditional Oreos work beautifully, but any cream-filled chocolate cookie delivers that signature crunch.
- Salted sweet cream butter: The butter coats cookie crumbs for irresistible crunch and buttery flavor.
- Hot fudge sundae topping: Use your favorite jarred fudge or a homemade version for a gooey middle layer.
- Heavy cream: Whips up ultra-creamy and stable—don’t skip it!
- Powdered sugar: Sweetens and thickens the whipped frosting effortlessly.
- Clear vanilla flavoring: Gives that classic “DQ” flavor and keeps your frosting snowy white, but you can use regular vanilla extract too.
- Colorful sprinkles (optional): Totally optional, but they make for the happiest finishing touch.
How to Make Homemade Dairy Queen Ice Cream Cake
Step 1: Bake the Cookie Crunch
Combine your crushed chocolate sandwich cookies with melted salted butter, spread them in an even layer on a lined baking sheet, and pop them in a 350°F oven for 7–8 minutes. This step transforms ordinary cookies into those irresistible, slightly salty chocolatey crunchies that make every bite of Homemade Dairy Queen Ice Cream Cake unforgettable. Let them cool completely—you want crispiness, not mush!
Step 2: Build the Chocolate Ice Cream Base
Spread softened chocolate ice cream into the base of your springform pan, taking care to get it all the way to the edges. Pop it back in the freezer for at least 30 minutes (or up to an hour) so it firms up and is ready for that gooey middle layer.
Step 3: Assemble the Fudge and Crunch Layer
Spoon (or gently spread) the room-temperature hot fudge over the chilled chocolate ice cream layer. Then scatter your cooled cookie crunchies evenly over the fudge. Freeze for at least 1 hour to lock in those beautiful, distinct layers!
Step 4: Add the Vanilla Ice Cream
Soften your vanilla ice cream just enough to spread, then layer it over the chocolate crunch. Smooth the top, then cover tightly and freeze for at least 4–6 hours, or overnight—patience is key for that iconic ice cream cake texture!
Step 5: Whip Up and Spread the Frosting
Beat your heavy cream, powdered sugar, and clear vanilla until gorgeous, fluffy peaks form. Release the cake from its pan, peel away any plastic wrap, and generously frost the top and sides. Pipe a festive border with a piping bag for that classic Dairy Queen look, then shower with colorful sprinkles.
Step 6: Slice and Serve
Return the finished cake to the freezer until you’re ready to party. When serving, let it sit out for a few minutes to soften, then dip a sharp knife in warm water for ultra-clean slices. Bask in the oohs and ahhs as you serve your very own Homemade Dairy Queen Ice Cream Cake!
How to Serve Homemade Dairy Queen Ice Cream Cake
Garnishes
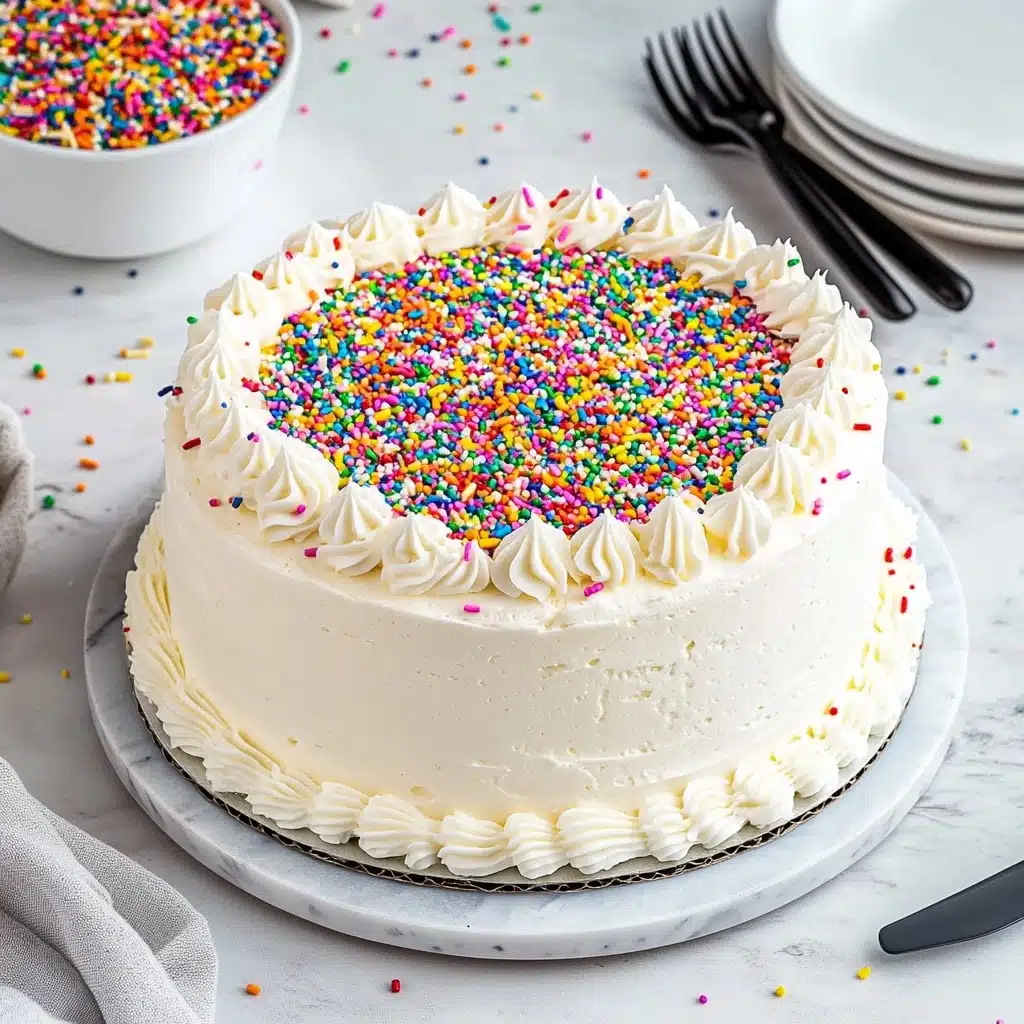
Sprinkles are the classic go-to, but you can make it your own with chocolate shavings, extra cookie crumbles, mini candies, or even a playful drizzle of caramel or extra fudge over the top just before serving. Try a few maraschino cherries for a nostalgic touch!
Side Dishes
Because Homemade Dairy Queen Ice Cream Cake is so showstoppingly rich, serve it with light, fresh sides like sliced strawberries, a fruit salad, or sparkling lemonade. For parties, you can also offer simple cookies or chocolate-dipped pretzels for guests to nibble between bites.
Creative Ways to Present
For special occasions, write a message with colored frosting or add edible glitter for serious sparkle. Make mini ice cream cakes in muffin tins for individual portions, or switch up the ice cream and cookie flavors to fit your party theme—think mint chip for St. Patrick’s Day, or peanut butter and chocolate for a Reese’s fan!
Make Ahead and Storage
Storing Leftovers
Leftover Homemade Dairy Queen Ice Cream Cake stores beautifully—just cover it tightly with plastic wrap or keep in an airtight cake keeper in your freezer. For best texture, eat within a week (though, let’s be honest, it rarely lasts that long!).
Freezing
Ice cream cake was born for the freezer! After decorating, you can freeze the whole cake, well-wrapped, for up to two weeks. If making far ahead, wait to add sprinkles and decorations until the day of serving for maximum festive impact.
Reheating
No reheating required, but let your Homemade Dairy Queen Ice Cream Cake sit at room temperature for 5–10 minutes before slicing to make for that perfectly soft texture and easy serving. Remember, a warm knife makes for flawless slices every time.
FAQs
-
Can I make Homemade Dairy Queen Ice Cream Cake with different ice cream flavors?
Absolutely! You can swap in any combination you like—think cookies & cream, caramel swirl, strawberry, or even mint chip. Just make sure to let each layer freeze between steps for those distinct, gorgeous layers.
-
Do I need a springform pan?
A springform pan makes cake removal and layering a breeze, but you can also use a deep cake pan lined with plastic wrap for easy lifting. Just be gentle when removing the cake!
-
How long does Homemade Dairy Queen Ice Cream Cake need to freeze before serving?
After assembly, it’s best to let the cake freeze at least 4–6 hours, but overnight is even better for the perfect slice-and-serve texture.
-
What’s the best way to slice and serve this ice cream cake?
Run a large, sharp knife under warm water and wipe it dry between slices. Let the cake sit out for just a few minutes to soften, then slice and serve quickly for perfect pieces.
Final Thoughts
Don’t wait for a birthday or special event—make your own Homemade Dairy Queen Ice Cream Cake and turn any day into a real celebration! Whether you stick with the classic flavors or put your own unique spin on it, nothing beats the joy of sharing this showstopping dessert with loved ones. Let your freezer do the work, and prepare to make some truly sweet memories!
Print
Homemade Dairy Queen Ice Cream Cake Recipe
- Prep Time: 20 minutes
- Cook Time: 10 minutes
- Total Time: 8 hours 30 minutes
- Yield: 12 servings
- Category: Baking
- Method: Baking
- Cuisine: American
Description
This Dairy Queen Ice Cream Cake recipe is a delightful frozen treat that combines layers of chocolate and vanilla ice cream, sandwich cookies, hot fudge, and a whipped cream frosting. Perfect for any celebration or special occasion!
Ingredients
Chocolate Ice Cream:
1 quart
Vanilla Ice Cream:
1 quart
Chocolate Sandwich Cookies:
1 package
Salted Sweet Cream Butter:
1/2 cup
Hot Fudge Sundae Topping:
1 cup
Heavy Cream:
2 cups
Powdered Sugar:
1/2 cup
Clear Vanilla Flavoring:
1 teaspoon
Colorful Sprinkles:
for garnish
Instructions
- Bake The Cookie Crunch: Combine crushed cookies with melted butter, spread on a baking sheet, and bake at 350°F for 7-8 minutes. Cool.
- Begin With The Base: Spread chocolate ice cream in a springform pan, freeze for 30 minutes to 1 hour.
- Make The Middle Layer: Spread hot fudge over chocolate ice cream, sprinkle cookie crumbs, and freeze for 1 hour.
- The Top Layer: Spread vanilla ice cream over the cookie crunch layer, freeze for 4-6 hours or overnight.
- Form The Frosting: Beat heavy cream, powdered sugar, and vanilla until stiff peaks form.
- Decorate The Dessert: Frost the cake, pipe a pattern, and top with sprinkles.
- Slice And Serve: Freeze until ready to serve.
Notes
- Store the cake wrapped in plastic or an airtight container in the freezer.
- Let it sit out a few minutes before serving to soften for easier slicing.
- Use a sharp knife dipped in warm water for clean slices.
Nutrition
- Serving Size: 1 slice
- Calories: 380
- Sugar: 28g
- Sodium: 190mg
- Fat: 24g
- Saturated Fat: 14g
- Unsaturated Fat: 8g
- Trans Fat: 0g
- Carbohydrates: 38g
- Fiber: 1g
- Protein: 3g
- Cholesterol: 70mg

