
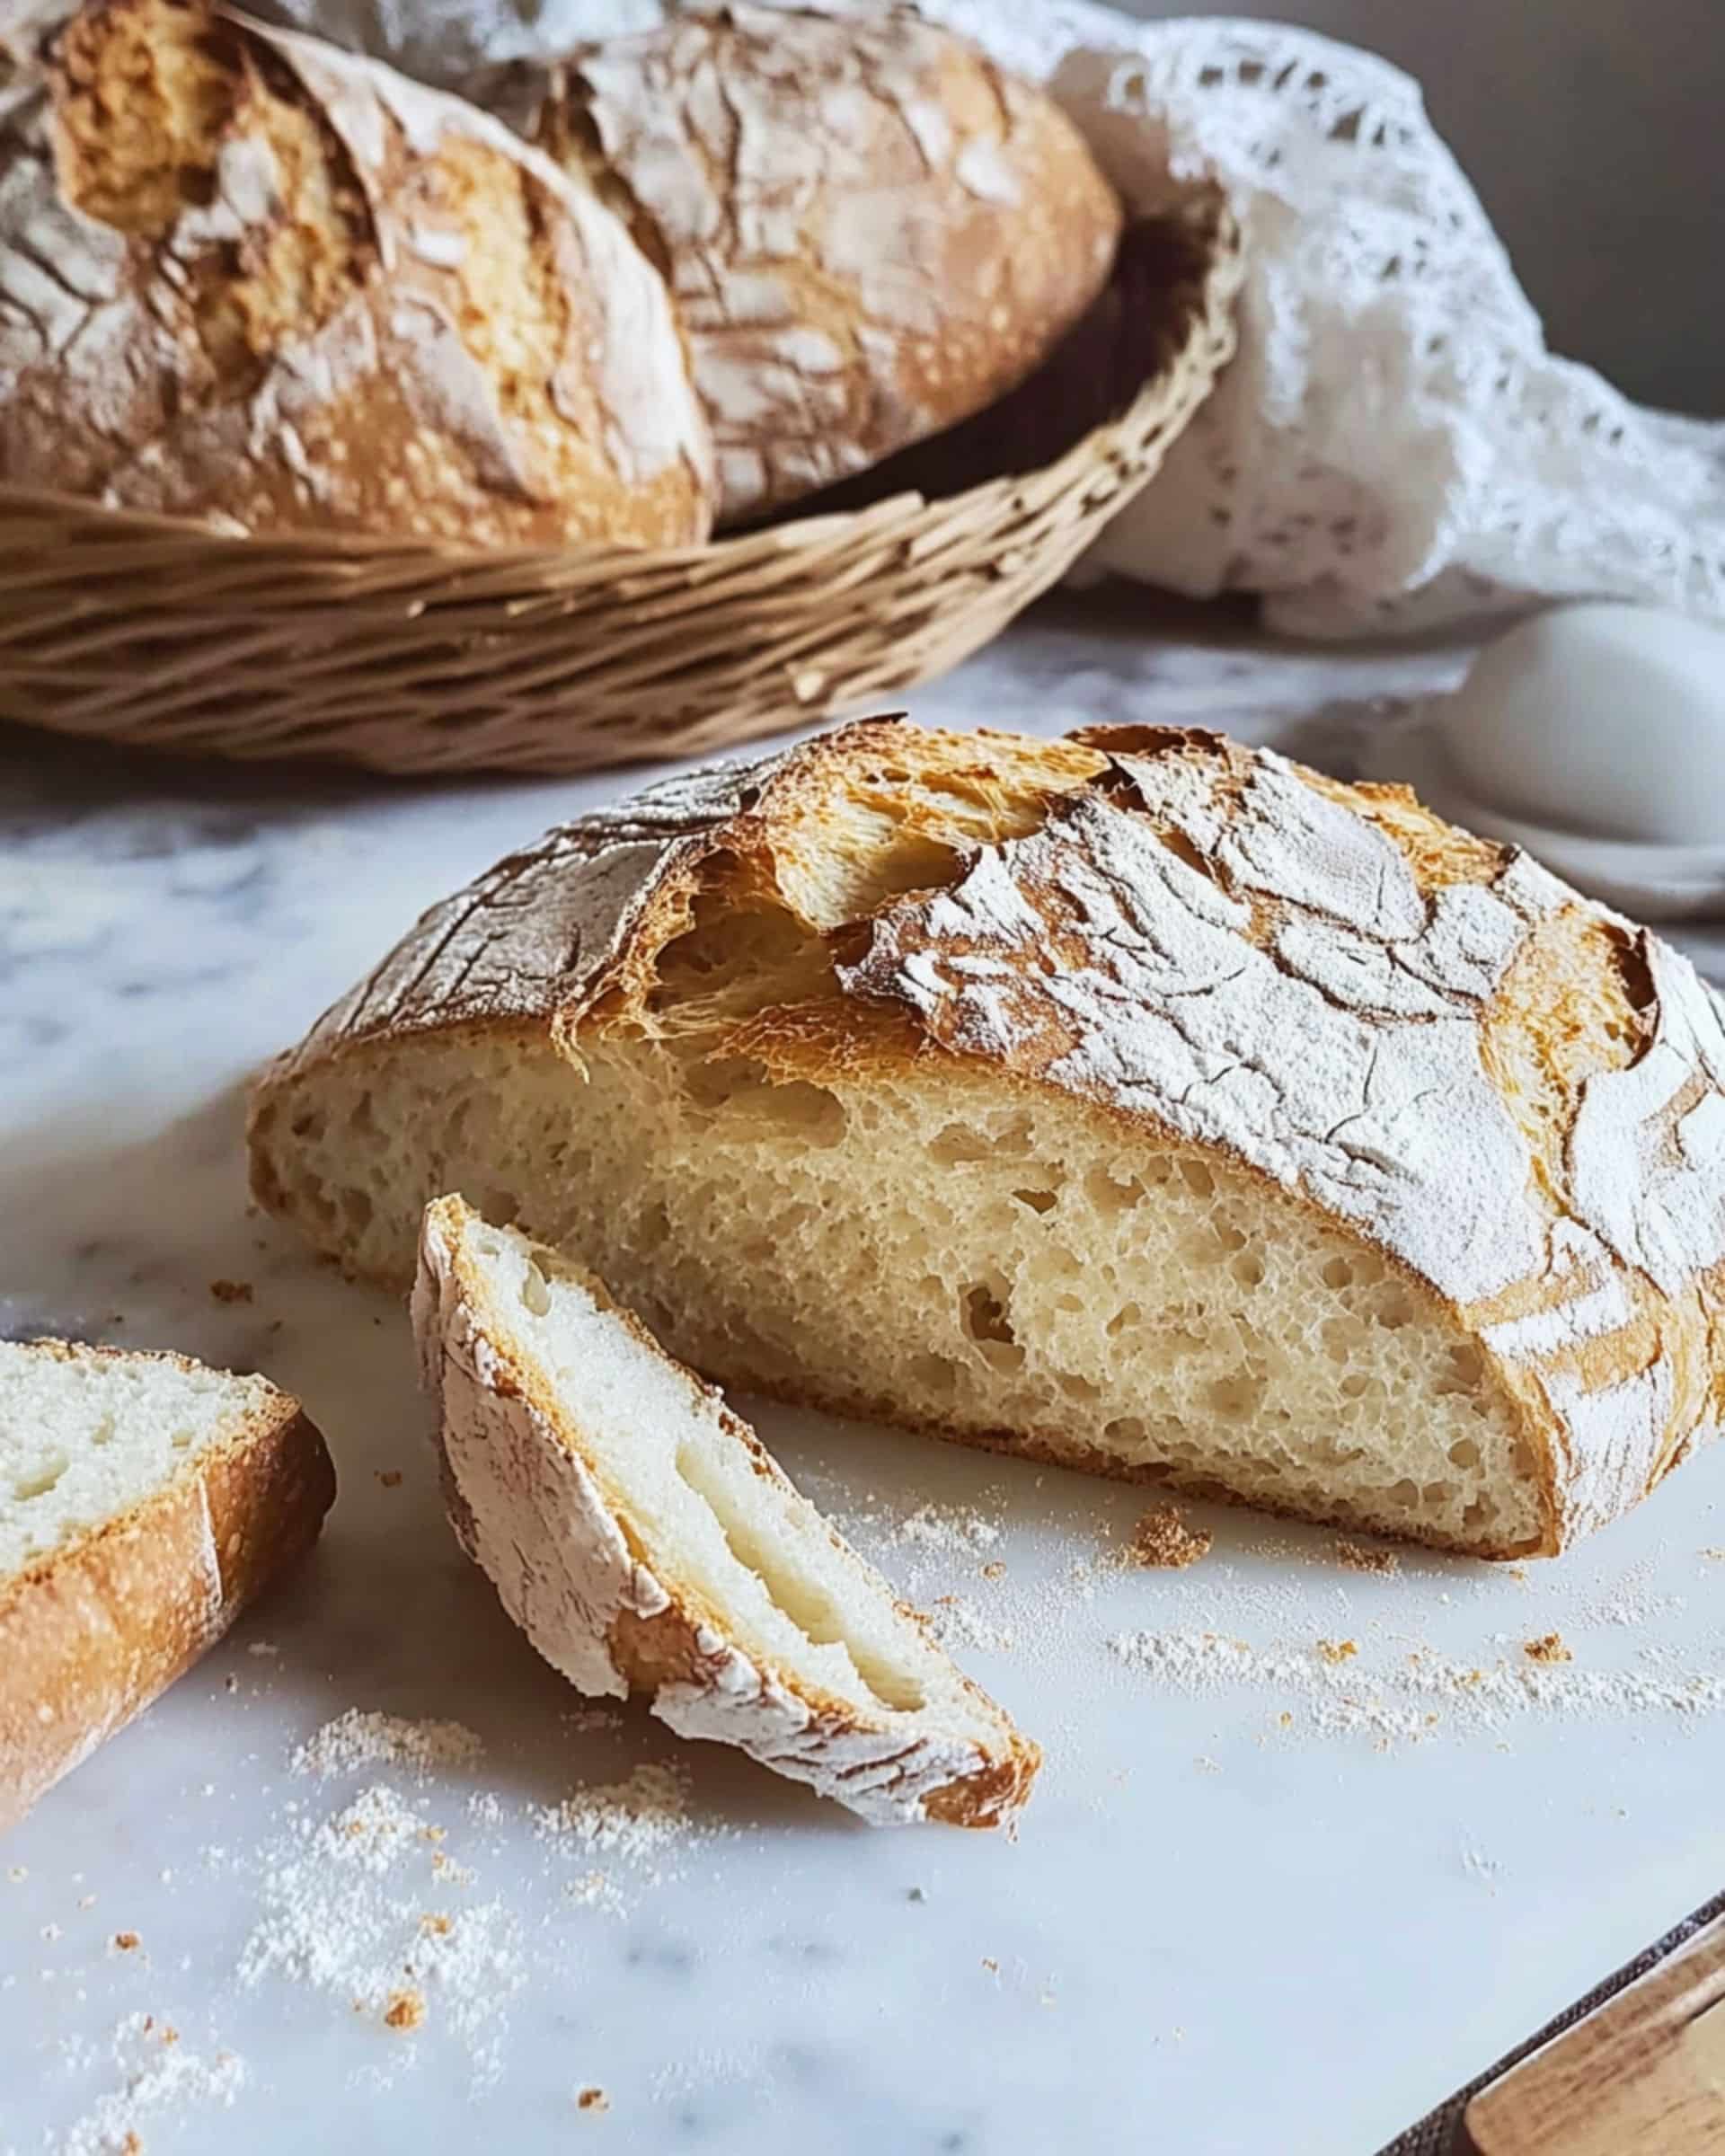
There’s something truly magical about a loaf of Homemade Crusty Italian Bread. With its crackling golden crust and pillowy crumb, this bread fills your kitchen with an aroma that’s impossible to resist. It’s the kind of bread you tear into while it’s still steaming, savoring every bite with a slather of butter or a dunk into peppery olive oil. What’s fantastic is how easy it is to achieve bakery-quality results right at home—even on a busy weeknight! No need for complicated techniques or fancy equipment; just a few simple steps and a little patience are all you need to bring this classic to your table.
Why You’ll Love This Recipe
- Ridiculously Simple: If kneading, folding, and shaping bread sounds intimidating, this recipe will put your mind at ease. You’ll be surprised at how beginner-friendly it truly is.
- Ultra-Crusty Exterior: That iconic Italian crust you crave? This bread delivers, with a shatteringly crisp shell that gives way to a soft, chewy inside.
- Versatility: Enjoy as a sandwich base, rustic side, or centerpiece for dipping—this bread goes with everything!
- Minimal Ingredients: Just a handful of pantry staples and you’re set. No eggs, no butter—just pure, classic ingredients for old-world texture and flavor.
- Make-Ahead Friendly: The dough is forgiving and the two-step rise makes it perfect for prepping ahead on your own schedule.
Ingredients
A little thought goes a long way here—each ingredient is chosen for a reason, so don’t skip the details!
- Manitoba Flour: This high-protein flour helps develop that beautiful, chewy gluten structure found in classic Italian bread.
- “00” Flour: Adds silkiness and helps balance the crust with a delicate, tender crumb. If you can’t find “00,” all-purpose flour works in a pinch.
- Water: Use room temperature water for better yeast activity. If your kitchen is cold, slightly warm water helps jumpstart the rise.
- Instant Dry Yeast: The star that brings your bread to life! No need for proofing—just mix it right in with the flour.
- Granulated Sugar: Just a touch wakes up the yeast and initiates that beautiful golden color during baking.
- Salt: Essential for rounding out flavor and controlling the yeast’s rise, giving you consistent results.
- Flour for Dusting: Makes handling soft, sticky dough a total breeze and ensures a rustic, crackly crust.
Tip: The key to great homemade bread is quality flour. If you can, splurge on true Manitoba and Italian “00” flours—they’re worth it!

Variations
Feel like playing around? This recipe is wonderfully flexible:
- Herb-Infused: Knead in chopped rosemary, thyme, or oregano for aromatic loaves.
- Add Seeds: Sprinkle sesame or poppy seeds over the top just before baking for a nutty crunch.
- Whole Wheat Version: Replace half the white flour with whole wheat for a heartier, earthier bread.
- Olive Loaf: Gently press in pitted olives or sun-dried tomatoes during the shaping process for a Mediterranean twist.
- Garlic Bread: Brush hot loaves with olive oil and minced garlic as soon as they come out of the oven.
How to Make Homemade Crusty Italian Bread
The Dough
Start by grabbing your largest bowl; your dough is going to rise a lot! Stir Manitoba and “00” flours together first. Add the instant dry yeast and sugar—this little pairing gets the yeast happily bubbling away. Gradually pour in most of your room temperature water while mixing. The dough should be soft and just a tad sticky; add the remaining water slowly, if needed. Finally, stir in the salt. You want a dough that comes together but isn’t stiff—it should feel springy.
The First Rise
Sprinkle a thin layer of flour over your dough. Cover tightly with cling film and place it in the oven with the light on (but heat off). This is a perfect environment for rising—warm and draft-free! Let it go for about 3 hours, or until it’s tripled in size.
The Folds
Don’t worry about sticky hands; just dust them with flour! Now, fold your dough “wallet style”—left to right, right to left, then top to bottom and bottom to top. This easy folding step gives your bread great structure.
Shaping the Loaves
Turn the dough out on a floured work surface. Use a sharp knife to cut it into three equal pieces. Shape each gently and place them onto a baking sheet lined with parchment. Like a true artisan, you can make fewer large loaves or more little ones—up to you.
The Second Rise
Dust with flour, cover again, and pop back in the (off) oven for about an hour, or until the loaves double. They might cozy up and touch—simply separate with a knife if needed.
Baking
Preheat your oven to 250°C (482°F). Bake loaves on the lower rack for 12 minutes—this helps form that signature crunchy crust. Move to the middle rack, bake for an additional 5 minutes, then drop the temp to 230°C (446°F) and bake 5 more minutes until golden brown.
Cool and Enjoy
Remove from the oven and let the bread cool slightly—if you can wait! The crust will sing as it cracks, signaling it’s perfection.
Pro Tips for Making the Recipe
- Rising Environment: Bread dough loves warmth. If your kitchen runs cold, place your bowl in the oven with just the light on for a perfect, gentle heat.
- Don’t Over-Flour the Dough: Resist the urge to add too much flour—the dough should remain soft and a little sticky for that air-light crumb.
- Cut with Confidence: Use a sharp knife to cut your risen dough into loaves; this keeps them well-shaped and beautiful.
- Steam for Extra Crust: Pop a small baking pan of hot water in the bottom of the oven during baking for even more crackle in your crust.
How to Serve
This bread is a showpiece all on its own—slice warm, tear by hand, or serve whole at the table for family-style sharing.
- Perfect with Olive Oil: Pour fruity olive oil into a bowl, add a pinch of salt, pepper, and maybe a dash of balsamic for classic Italian dipping.
- Soup and Stew Companion: Dip generous hunks into minestrone, tomato soup, or hearty stews.
- Sandwiches and Bruschetta: Slice and layer with mozzarella, tomatoes, basil, or your favorite cured meats.
- Breakfast Toast: Crisp up slices for toast and top with butter and jam or avocado.
Fresh bread + good company = a perfect meal.
Make Ahead and Storage
Storing Leftovers
Wrap leftovers in a clean kitchen towel or paper bag once completely cool—this keeps the crust crisp at room temperature for up to two days. For longer freshness, store in a zip-top bag or airtight container, though the crust will soften.
Freezing
This bread freezes beautifully! Cool completely, then wrap tightly in plastic wrap and a layer of foil. Freeze whole or sliced for up to 2 months.
Reheating
Refresh your bread by popping slices or whole loaves in a 180°C (350°F) oven for 5-7 minutes. This restores the crispness and warmth, making leftovers taste freshly baked.
FAQs
Can I use only all-purpose flour if I don’t have Manitoba or “00” flour?
Absolutely! All-purpose flour works well if that’s what you have on hand. The crumb and crust will be just slightly less chewy and airy, but you’ll still end up with a delicious loaf.
Why is my bread not rising much?
Chilly kitchens are usually to blame. Make sure your yeast is fresh (check the expiry date!) and give the dough a warm place to rise, like an oven with the light on. If your dough is slow, simply extend the rise time.
How do I keep the crust crispy after baking?
Cool the bread uncovered to let moisture escape. If storing for longer, wrap loosely in a towel. For reheating and recrisping, a quick stint in a hot oven does wonders!
Can the dough be prepared in advance?
Yes! After the first rise, you can cover and refrigerate the dough overnight. Shape and proof as usual the next day; it may need extra time to come back to room temperature before baking.
Final Thoughts
There’s a certain pride in pulling a rustic, golden loaf of Italian bread from your own oven. It’s easier than it looks, endlessly rewarding, and a recipe everyone should try at least once. Whether you’re a bread-baking newbie or a seasoned home baker, this Homemade Crusty Italian Bread promises comfort, flavor, and a bit of everyday magic. Give it a go, and let your kitchen be filled with the irresistible scent—and taste—of real, homemade bread!
Print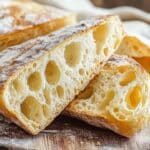
Homemade Crusty Italian Bread Recipe
- Prep Time: 15 minutes
- Cook Time: 25 minutes
- Total Time: 4 hours 40 minutes
- Yield: 10 servings 1x
- Category: Bread
- Method: Baking
- Cuisine: Italian
- Diet: Vegetarian
Description
This homemade crusty Italian bread recipe yields beautifully golden loaves with an irresistible crispy crust and fluffy, chewy interior. Made with a blend of manitoba and ’00’ flour, this bread rises perfectly for a bakery-style result, making it ideal for sandwiches, dipping in olive oil, or enjoying fresh out of the oven.
Ingredients
Flours
- 300 g manitoba flour (2 1/2 cups)
- 200 g ’00’ flour (1 1/2 cups), plus more for dusting
Leavening & Flavorings
- 7 g instant dry yeast (2 1/4 teaspoons)
- 10 g granulated sugar (2 teaspoons)
- 15 g salt (2 1/2 teaspoons)
Liquids
- 400 ml water, room temperature (1 3/4 cups)
Instructions
- Prepare the Dough: In a large bowl, combine the manitoba flour and ’00’ flour. Add the instant dry yeast and granulated sugar to the flours. Mix thoroughly using a fork or whisk. Gradually pour in 370 ml of the water while mixing. If the dough appears dry, add the remaining water as needed, a little at a time. Finally, add the salt and mix until you have a soft, slightly sticky dough.
- First Rise (Leavening): Lightly dust the top of the dough with flour. Cover the bowl tightly with cling film and place it in the (turned off) oven to rise for about 3 hours, or until the dough triples in size.
- Fold the Dough: Once risen, turn the dough onto a floured work surface. Dust your hands with flour, then fold the dough like a wallet: left to right, right to left, then top to bottom and bottom to top. This process strengthens the dough structure for better texture.
- Shape the Loaves: Sprinkle flour over the dough’s surface, gently flip so the smooth side is up, and divide into three equal loaves using a long, sharp knife. Place the loaves on a large baking sheet lined with parchment paper, spacing as evenly as possible. Dust loaves lightly with flour, shaping and rounding the ends as needed. Alternatively, make two large or several small loaves if desired.
- Second Rise: Let the shaped loaves rise in the (turned off) oven for about 1 hour, or until they double in size. The loaves may spread and touch, but they can be separated before baking.
- Bake the Bread: Preheat the oven to 250°C (482°F). Place the baking sheet on the lower rack and bake for 12 minutes. Move the sheet to the center rack and bake another 5 minutes. Without opening the oven, reduce the temperature to 230°C (446°F) and bake for a final 5 minutes, or until golden brown.
- Cool and Serve: Take the bread out of the oven and cool for about 5 minutes before slicing. Enjoy your crispy, fragrant Italian bread fresh!
Notes
- Bread dough rises best in a warm, humid environment around 28°C (82°F). The oven (turned off) is ideal for rising dough.
- If your kitchen is cold, turn on the oven light to gently warm the oven during proofing.
- You can adjust loaf sizes as preferred—make two large, three medium, or several small rolls.
- If loaves spread and touch during the second rise, easily separate them with a knife before baking.
- Use a kitchen scale for the most accurate results with flour and water measurements.
Nutrition
- Serving Size: 1/10th of loaf
- Calories: 170
- Sugar: 0.5 g
- Sodium: 370 mg
- Fat: 0.5 g
- Saturated Fat: 0.1 g
- Unsaturated Fat: 0.4 g
- Trans Fat: 0 g
- Carbohydrates: 36 g
- Fiber: 1 g
- Protein: 5 g
- Cholesterol: 0 mg


Thank you for your sharing. I am worried that I lack creative ideas. It is your article that makes me full of hope. Thank you. But, I have a question, can you help me?
Thank you for your sharing. I am worried that I lack creative ideas. It is your article that makes me full of hope. Thank you. But, I have a question, can you help me? https://accounts.binance.com/en-ZA/register-person?ref=B4EPR6J0
mostbet yengil versiya [url=mostbet24618.help]mostbet24618.help[/url]